 PRINTING LARGE OR UNIQUELY SHAPED PARTS If you need to make parts larger than the printing area of your printer or parts that have intricate projections, here are a few choices in order of popularity:
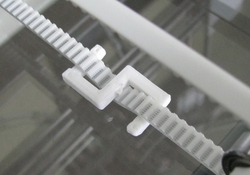
Problem: “The dimension of my part in X (or Y) is suddenly under-spec.” -or- “The sides of my round object are flat.” If your printer was known to be printing with dimensions within tolerance (meaning the settings in the firmware are good) and all of sudden parts are measuring smaller, check the tension of your drive belt. Loose belts will require the motor pulley to need to take up this little bit of slack before the extruder/print bed gets moved. This results in parts being undersized. If for some reason you have difficulties tightening your belt, try printing and attaching one of these nifty little S-clips (Thing:10082). Little particles on the Inside Corners I’m not sure what to call this phenomena, but basically little particles form on the inside corner(s) of your print and create a little worm-like structure along with some stringing. The example pictured on the right is printed with the same settings as you would choose for a vase: zero infill, zero top layers. However, there is an additional structure in the middle of the part. Solution: In Slic3r configuration under Print Settings > Infill , uncheck “Only retract when crossing perimeters.” What happens is Slic3r thinks that the nozzle is still within a filled layer even though infill is set to zero, and doesn’t recognize that you want two clean and distinct boundaries. WELCOME 3D Printing Tips & Tricks This section will be continually populated with tips & tricks geared towards the beginner 3D printer. Please check back often for updates! Also, check out Reprap Forums for tons of great information: http://forums.reprap.org/ Have a great tip you’d like to share? Find a mistake on this page? Please send us a comment!
0 Comments
Leave a Reply. |
Archives
August 2023
Categories |
B3D-ONLINE (AKA Build 3D online) Presented by B3D Group Sdn Bhd. Founded By Bruce Mui . Click for T&C.


 RSS Feed
